![]() In iOS 13, Apple has enhanced the built-in photo and video editing capabilities available to iPhone and iPad users, and for the first time it has made many of its stock photo adjustment tools available for editing video.
In iOS 13, Apple has enhanced the built-in photo and video editing capabilities available to iPhone and iPad users, and for the first time it has made many of its stock photo adjustment tools available for editing video.
One of those is the filter tool, so now you can easily apply an Instagram-style filter to one of your captured videos in just a few quick taps. The following steps show you how it's done.
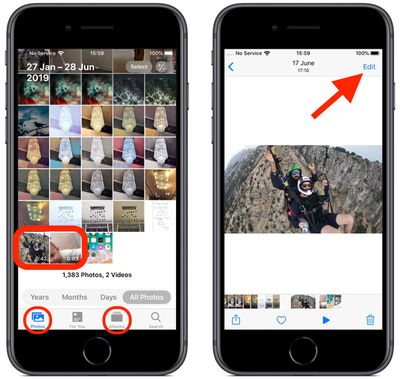
- Launch the stock Photos app on your iPhone or iPad.
- Select a video from your Photo library using the Photos tab. If the video you want to edit wasn't taken recently, you'll probably find it quicker by tapping the Albums tab, scrolling down and then selecting Videos under Media Types.

- Once you've selected a video, tap Edit in the top-right corner of the screen.
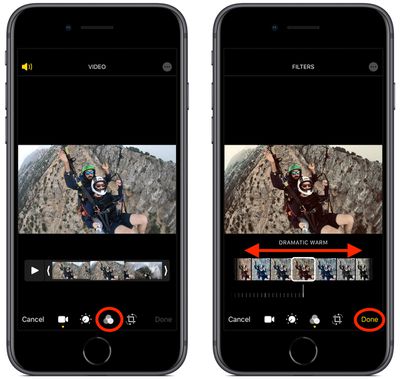
- Tap the Filters icon (it looks like a Venn diagram) at the bottom of the screen.

- Swipe through the nine available filters to get a preview of each one applied to your video.
- Let your finger come to a rest, and a horizontal dial will appear below the selected filter. Use you finger to move the dial and adjust the intensity level of the filter.
- Tap Done in the bottom right of the screen to apply the filter effect to your video.
Note that you can apply these filters whenever you capture video using the built-in Camera app – you don't even have to unlock your device to use them on the video you just shot.


