 In iOS, Apple includes a feature that allows you to establish relationships for different contacts, which makes getting in touch with the people close to you much more personable.
Once you've set it up, the Contacts app's relationships feature goes hand in hand with Siri, so rather than asking it to "Text Hannah," you can say "Text my sister" and the voice-activated assistant will know that Hannah is your sister.
The following steps show you how to create contact relationships using Siri or by manually adding them to the Contacts app. If you own additional Apple devices, the cool thing is that you only have to do this once and iCloud will sync the changes across all of them.
How to Create a Contact Relationship on iOS
- On your iPhone or iPad, hold down the Home button (or the Side button if your iOS device doesn't have one), or say "Hey Siri" to invoke the assistant handsfree.
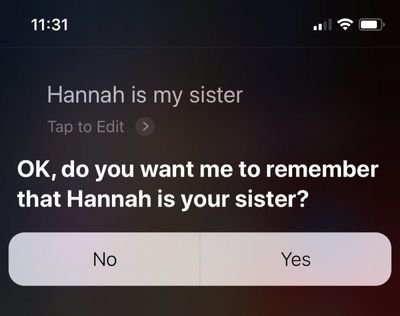
- Say the name of the contact and your relationship with them, such as "Hannah is my sister." (If you have two sisters, you can help Siri distinguish them by saying "Hannah is my older sister," for example.)

- When Siri asks if you want it to remember the relationship, answer "Yes" or tap the Yes button that appears.
Add a Relationship Manually in the Contacts App
If you want, you can manually add relationships in the Contacts app instead. Here's how.
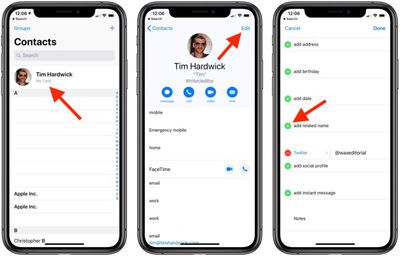
- Launch the Contacts app on your iPhone or iPad.
- Tap your own contact card.
- Tap Edit in the top-right corner of the screen.

- Tap the plus (+) button next to add related name.
- Enter the name of the contact you want to establish a relationship with.
- Tap the relation field next to the contact's name and select the relationship you want to establish with them. (Tap Custom to define a relationship not offered in the list.)
- Tap Done.
Remember, you can establish as many relationships as you want using the above methods, so long as the person exists in your contacts.


